When Riley Blake invited me to be a part of this blog tour a few months ago, I was happy to have something springy and fun to look forward to! They say that March comes in like a lion and goes out like a lamb, but here in the Ohio River Valley of Indiana, sometimes those memos get mixed up or completely lost all together. This year was no exception. We got 8″ of snow on our first day of Spring Break. Hardy-har-har! Needless to say, sewing with Lori Whitlock’s newest line, , was a breath of fresh air and made me want more SPRING!
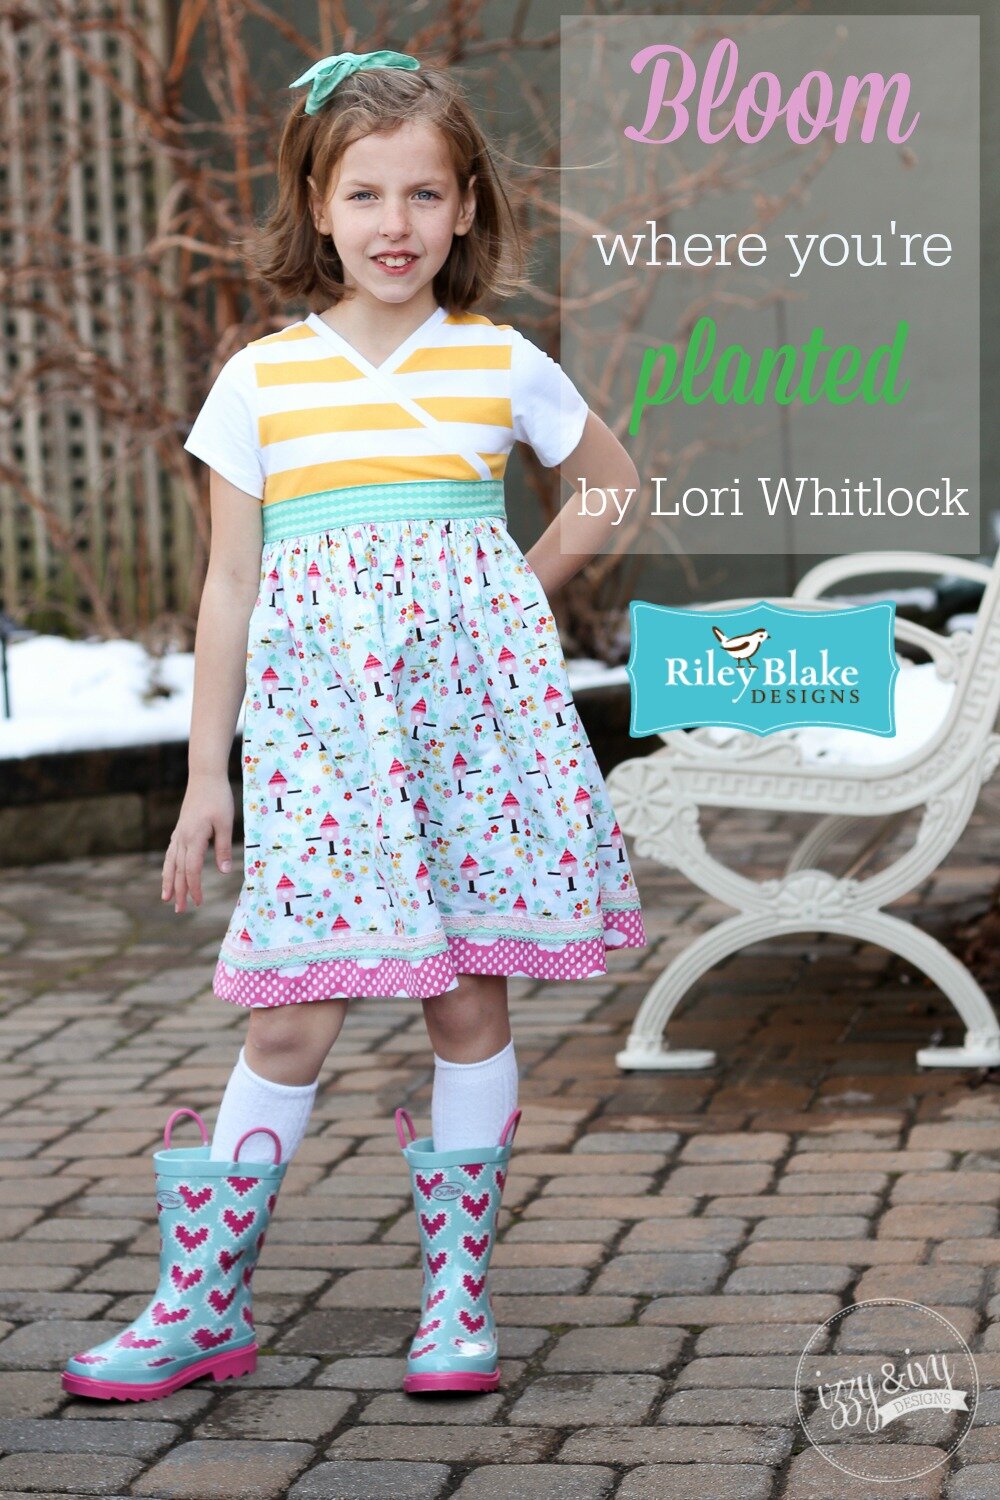
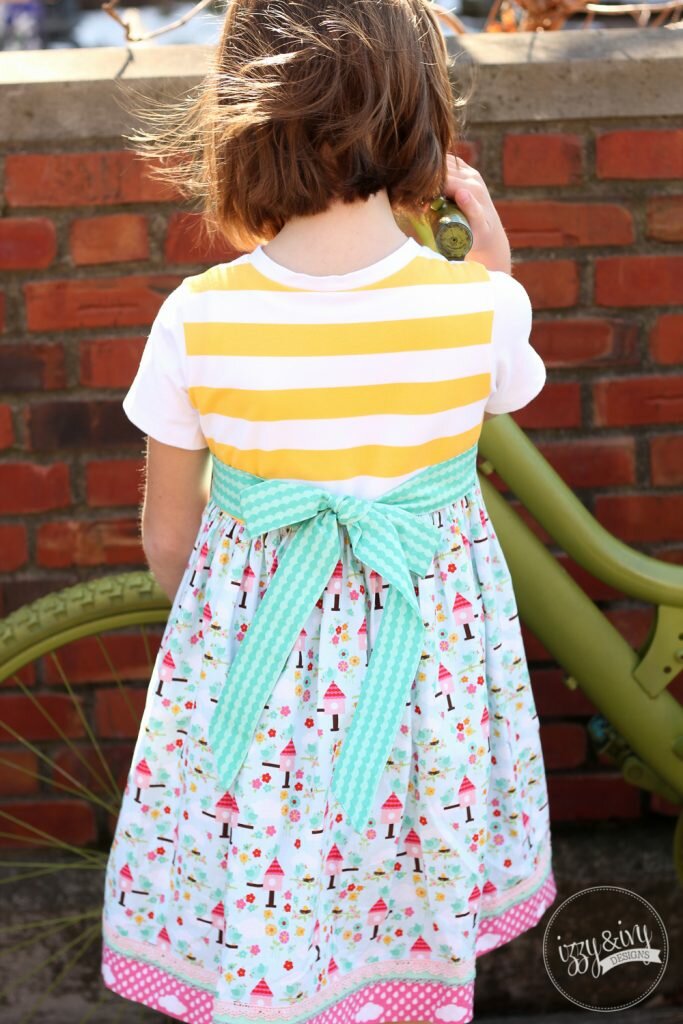
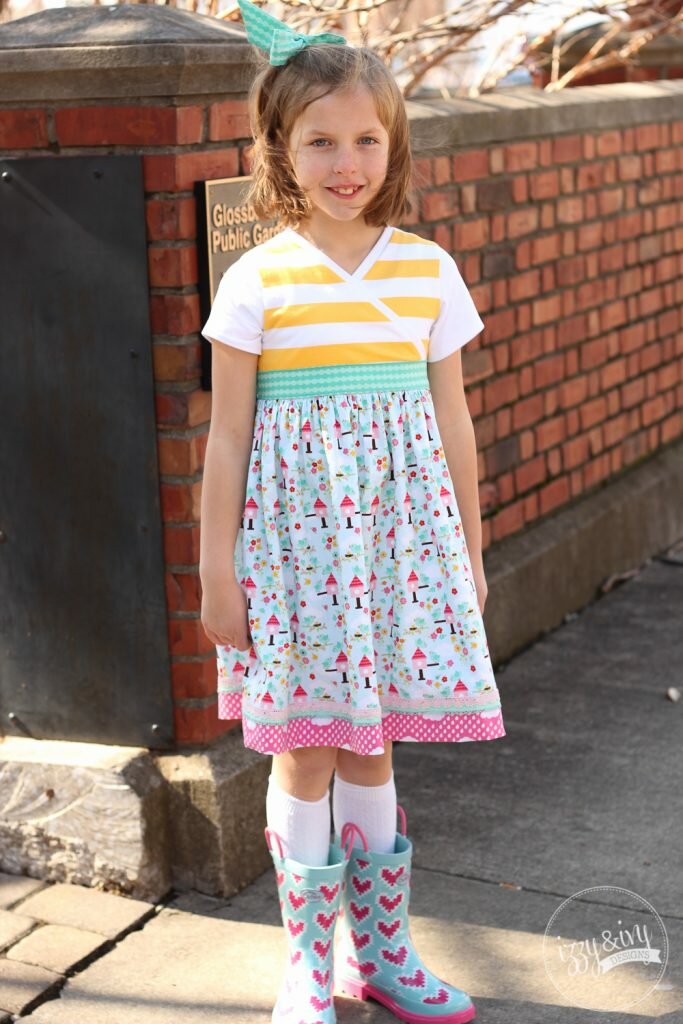
I have always loved the bright colors and fun patterns that Lori uses in her designs, and when I saw these pinks, aquas, and yellows, I wanted to make a sweet dress that would be perfect for any Spring outing! I started with our , hacked the sleeves for warmer temps, and started mixing and matching. I started with for my skirt, then added and . And I would be remiss to leave out my favorite Riley Blake Knit for the bodice- !
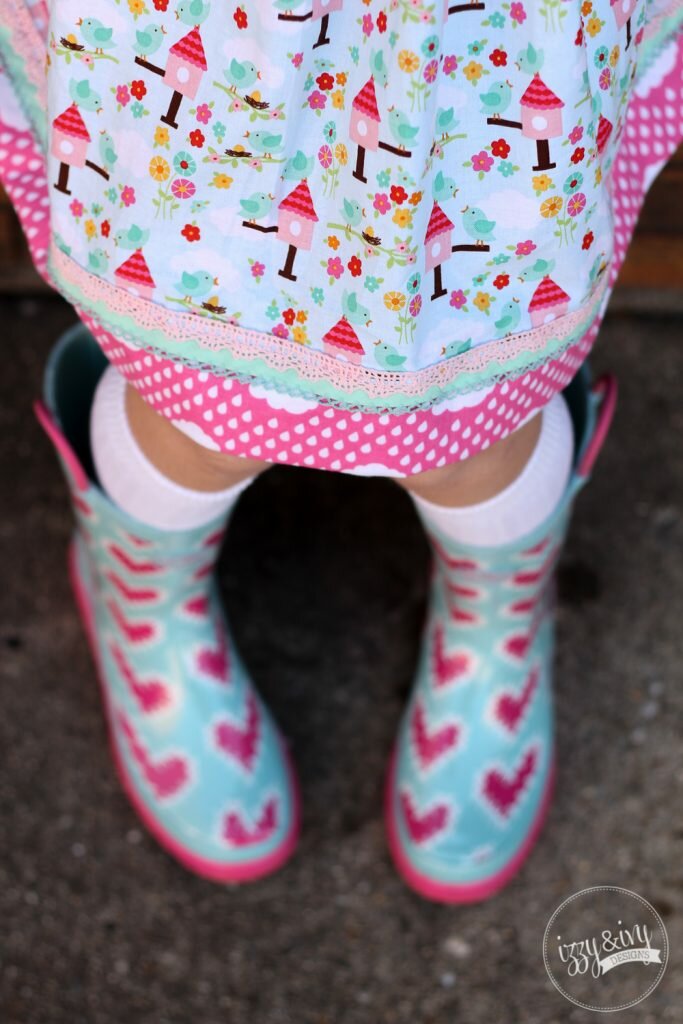
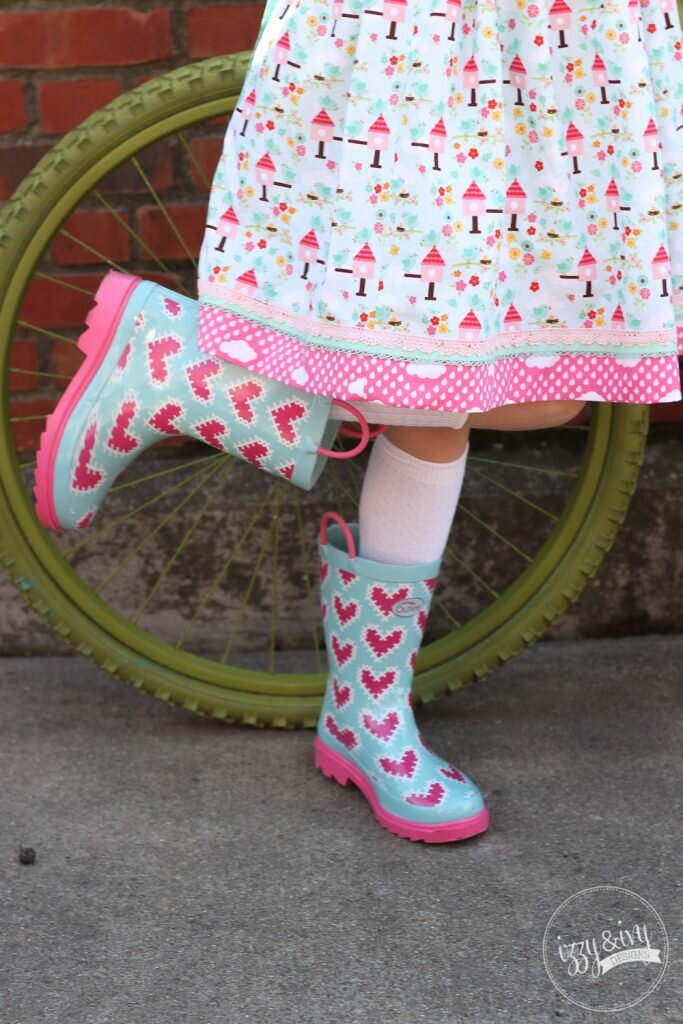
How cute does this look with rainboots and knee socks! I will be so sad if she ever gets too old for this look!
My trims are from and , both on Etsy. I don’t know what I’d do without the stash of trims that is slowly overtaking my sewing area!
While I love our Tallulah Dress with long sleeves and the sleeveless hack, I really felt like short sleeves were in order for this Spring dress. I borrowed the short sleeve length and shape from our and I love the results! You can certainly apply the technique with any length sleeve, too!
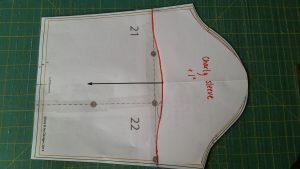
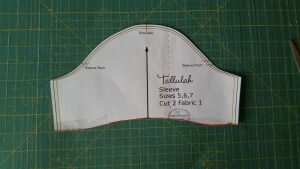
I printed out my Tallulah sleeve, and I’m leaving the top curve of the sleeve as is, since it has a front and a back. The Charly sleeve is cut on the fold, so to make things easier, I made a copy of the Charly pattern piece so that I had both sides of the sleeve.
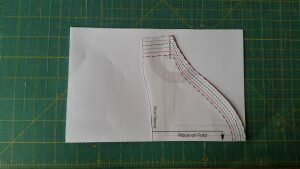
To do this, fold a piece of paper in half, then line up the fold of the paper with the “fold” portion of the sleeve piece.
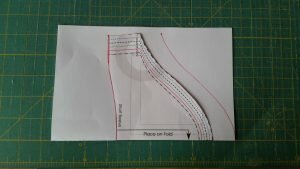
I wanted the sleeve to be 1″ longer, too, so I marked the top portion of the sleeve only, then moved the pattern piece over 1″ and traced the bottom of the sleeve.
I then connected the top and bottom edges and cut out my full piece.
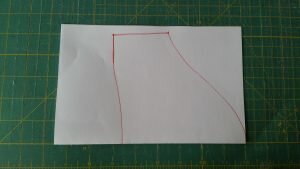
To make my new piece fit my Tallulah Dress, I placed the Charly Sleeve pattern piece on top of my Tallulah Sleeve pattern piece and ONLY transferred the bottom edge. Depending on what pattern you use, there may be a gap on the far edges of the underarm, so just fill that in as needed.
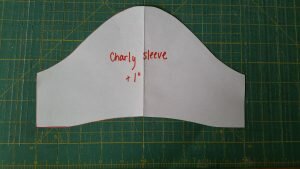
Voila! A short sleeve for Tallulah!
Proceed per pattern instructions, but instead of adding the cuff to the bottom of the sleeve, press a 1/2″ hem on the sleeve and topstitch into place with your favorite method for knits.
Are you still with me?! Be sure to check out the other stops from Cream Craft Goods and Made for Mermaids on the Bloom Where You’re Planted tour. To celebrate my short sleeved Tallulah dress, I’m offering you all 20% off my entire , now through March 31st. Use the code BLOOM for savings on PDF and Paper patterns!